Succeeding with Alocasia in Low Light: A Comprehensive Guide
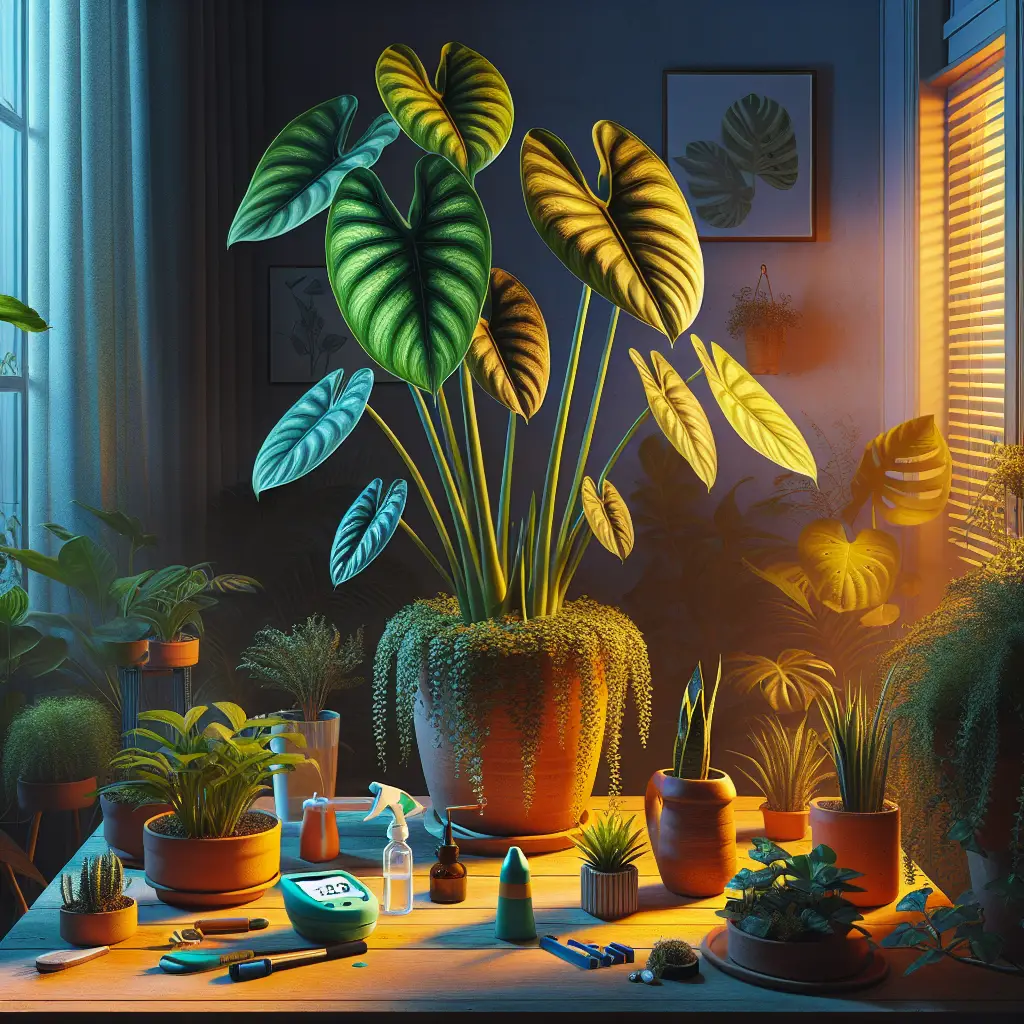
Understanding Alocasia Plant Care Essentials
- Pet Friendly: Caution advised, Alocasia plants can be toxic to pets if ingested.
- Light Requirements: Prefers bright, indirect light but can adapt to lower light conditions with the right care.
- Watering: Consistent watering is key, allowing the topsoil to slightly dry out between waterings.
- Humidity: Thrives in higher humidity but can tolerate average home humidity levels.
- Temperature: Prefers warmer temperatures, typically between 60°F and 80°F (15°C – 27°C).
- Difficulty: Moderate care required, can be challenging for beginners but rewarding with the proper attention.
Creating the Ideal Low Light Environment for Alocasia Plants
Have you ever walked into a room and felt invigorated by the greenery, despite the lack of sunlight piercing through the windows? That’s the magic of having plants like Alocasia, which can adapt to lower light conditions. But here’s the thing, while Alocasia plants prefer bright, indirect light to truly thrive, not every plant enthusiast has the luxury of a sun-drenched space. You might be wondering, “Can my Alocasia really succeed in a low-light space?” The answer is yes, with some considerations.
First and foremost, understanding light intensity and duration is vital. Low light doesn’t mean no light. Your Alocasia still needs to photosynthesize, so place it in a space where it can receive gentle, filtered light. A north-facing window or a spot several feet away from a brighter window can serve as a cozy nook for your plant.
When light is scarce, every hour of ambient sunlight counts. Consider clearance from other objects, and avoid placing your Alocasia behind curtains or in a dark corner. Reflective surfaces, like mirrors, can also help bounce light around the room, indirectly amplifying the available light for your plant.
Since lower light conditions can slow growth and reduce vitality, you might be tempted to reach for a grow light. If you decide to go this route, the GE BR30 LED Grow Light is matching the needs of many indoor gardeners. Users have reported that this LED light delivers a natural-looking glow that plants seem to love, promoting healthy growth without being too harsh or energy-consuming.
Find This and More on Amazon
Mastering Watering Techniques for Alocasia in Low Light
Watering any houseplant correctly is an art form, and it’s even more crucial with Alocasia in less-lit conditions. In lower light, Alocasia will use water more slowly, meaning the soil will stay damp for longer periods between watering. Thus, your watering schedule should be less frequent than it would be if the plant were basking in bright indirect sunlight.
To nail this, always check the top inch or two of the soil with your finger. If it’s dry, give your Alocasia a drink, allowing water to drain fully without leaving the plant in standing water. If you’re unsure, it’s better to err on the side of underwatering, as overdoing it could lead to root rot, especially in low light where evaporation is slower.
For those of you seeking a tool to eliminate the guesswork, the Thirsty Plant Moisture Meter is getting rave reviews for its accuracy and ease of use. Garden enthusiasts say that this simple probe takes the mystery out of when to water, which is especially helpful for Alocasia plants that are sensitive to overwatering.
Find This and More on Amazon
Choosing the Right Soil Mix for Alocasia Growth
Soil composition can make or break your Alocasia’s chances of flourishing in a less-than-ideal light situation. Soil that retains too much moisture is your Alocasia’s nemesis, particularly in low light. You want a well-draining mix, rich in organic matter, that still holds moisture without becoming soggy.
One particular soil blend gathering praise from plant parents is the FoxFarm Ocean Forest Potting Soil. It strikes an excellent balance between drainage and water retention owing to its mix of forest humus, sandy loam, and peat moss, supplemented by sea-going fish and crab meal. With this soil, Alocasia enthusiasts find that their plants are less likely to suffer from root rot, a common concern in dimmer conditions.
Find This and More on Amazon
Humidity and Temperature Control for Healthy Alocasia Plants
While we often focus on light and water as the cornerstones of plant care, humidity and temperature also significantly impact Alocasia’s well-being. In conditions of low light, maintaining a stable environment becomes even more vital. Ideally, Alocasia plants enjoy humidity levels of around 60-75%. If your home’s air is drier, especially during winter, consider using a humidifier. The Levoit Ultrasonic Humidifier has been suggested by users for its efficient and quiet operation, perfect for maintaining the tropical vibe your Alocasia craves without disrupting your peace.
Find This and More on Amazon
Temperature fluctuations can stress your Alocasia, particularly when combined with low light. Cooler temperatures slow down plant metabolism, which means growth may become sluggish, and the effects of overwatering or poor soil choice are exaggerated. Keeping the room between 60°F and 80°F will help your Alocasia stay strong, even when the light isn’t ideal.
Optimizing Fertilization for Alocasia in Dim Conditions
Feeding your Alocasia the right amount of nutrients without overwhelming it is key, especially when sunlight is limited. The reduced light means your Alocasia isn’t growing as quickly, and as such, it won’t need as much fertilizer as it might in a brighter environment.
In low light, a balanced, water-soluble fertilizer, like the Miracle-Gro Indoor Plant Food, can be applied at half-strength every month during the growing season. This fertilizer is noted for its ease of use and how it can cater to the nutritional needs of indoor plants without the risk of burn when used correctly.
Pros:
- Easy to use formula
- Can be diluted for gentle feeding
- Encourages lush growth without promoting legginess
Cons:
- Overuse can lead to nutrient burn
- May attract pests if not used as directed
Understanding Alocasia Pests and Diseases in Low Light
Low light conditions often lead to certain vulnerabilities in plants, making them potential targets for pests and diseases. Alocasia plants, in particular, can succumb to ailments like spider mites, scale, and root rot under suboptimal lighting. To counter this, regular inspection of your plant is essential. Look out for telltale signs of trouble like discolored leaves, stunted growth, or a sticky residue on leaves that can indicate pest issues.
It may interest you to try using a natural pest control method such as Neem Oil, which is a favorite for many plant enthusiasts due to its organic nature and effectiveness against a range of common pests. Application instructions vary, but most recommend diluting the oil and applying it directly to the affected areas, being careful to follow the product guidelines.
Pot and Repotting Tips for Alocasia
The choice of pot is another factor that can tremendously affect your Alocasia’s health in low light. Pots with good drainage are imperative to avoid water logging. Terra cotta pots naturally wick moisture away from the soil, which can be beneficial in dimmer conditions where soil takes longer to dry out.
Repotting should be done with care, as Alocasia roots are delicate and prone to damage. Repotting is usually necessary every couple of years or when the plant becomes root-bound. Gently tease the roots apart if they’re tangled and repot into a slightly larger pot with fresh, well-draining soil to give your Alocasia a new lease of life.
Pruning and Cleaning for Alocasia Aesthetics and Health
Your Alocasia will occasionally need to be pruned to remove yellowing or dead leaves. This not only helps the plant look its best but also prevents potential pest and disease issues that can arise from decaying organic matter. When pruning, always use clean, sharp scissors or pruners to make clean cuts without damaging the plant.
Cleaning the leaves of your Alocasia not only keeps the plant looking shiny and healthy but also allows it to photosynthesize more efficiently. Dust and grime can block light absorption, which is already at a premium in low-light conditions. You can use a damp cloth to gently wipe each leaf, supporting it with your hand to prevent snapping or bruising.
Long-Term Success with Alocasia in Low Light
Cultivating Alocasia in low-light conditions can be a satisfying endeavor if approached with the right knowledge and tools. Remember to monitor the lighting, regulate watering and humidity, choose the correct soil, and provide the necessary nutrients without overfeeding. Be vigilant against pests, choose the right pot and repot carefully, and keep your Alocasia clean and well-pruned.
As long as you’re mindful of these factors and adjust your plant care routine accordingly, your Alocasia can not only survive but also thrive in low light. Every plant has its unique personality, so be patient and enjoy the process of getting to know what works best for your Alocasia. With dedication and a little bit of green-thumb finesse, even a dimly lit room can become a tropical escape.
Dealing with Common Alocasia Issues in Suboptimal Lighting
Tackling common issues in Alocasia plants when the lighting isn’t perfect is part of ensuring their success. One common problem you may face is leaf drooping or yellowing. In many cases, this can be a sign of overwatering or poor drainage, but it could also be due to insufficient light. If your Alocasia’s leaves are yellowing, assess both its watering schedule and its position relative to light sources. Sometimes, simply moving your plant to a slightly brighter area or adjusting watering can correct these issues.
If you notice the edges of the Alocasia leaves browning, it might be related to the humidity levels or water quality. In low light, it’s even more important to maintain steady humidity around the plant. You could use a pebble tray or mist your plants to increase local humidity. As for water, it’s worth noting that Alocasias can be sensitive to tap water chemicals. Using filtered water, or leaving tap water out overnight to dissipate chlorine, can prevent brown tips on leaves.
Leaf size and stem strength may also be affected in low light. Alocasia plants that don’t receive adequate light may produce smaller leaves and have weaker stems. Although they can adapt to less light, their growth might not be as vigorous as it would be in ideal lighting conditions. If leggy growth or small leaves become an issue, considering a source of supplemental light such as the aforementioned grow light could be beneficial.
Seasonal Adjustments for Year-Round Alocasia Care
Understanding the seasonal changes in your home environment can greatly benefit the health of your Alocasia plants. During winter months, light levels decrease, and most homes have drier air due to heating systems. This seasonal shift means you’ll need to adjust your care routine; watering less often and potentially moving your Alocasia to a brighter spot to make up for the lower light levels can help. Additionally, using a humidifier can counteract the dry air, and extra care should be taken to ensure that your plant is not subject to cold drafts or close to heating vents, which can dehydrate the leaves.
Conversely, during the brighter months of spring and summer, you might find that your Alocasia is growing more vigorously. This is the time to be more generous with watering (always checking the soil first) and to provide balanced fertilization that matches the increased growth.
Propagating Alocasia to Maximize Your Collection
If you find success in growing Alocasia in low light, you may want to expand your collection by propagation. One of the best methods for propagating Alocasia plants is by division. This is usually done during repotting. Carefully separate offsets or ‘pups’ from the mother plant, making sure each division has at least one growing point or leaf. Plant each division in its pot with an appropriate soil mix as discussed previously, and care for it as you would a mature plant, keeping in mind that the new plants may need a bit more humidity and consistent watering until they establish.
Another method is to propagate from cuttings, particularly if you’re pruning your Alocasia and have healthy sections of stem. Cut a section below a node, let it callous over for a day, and then plant it in moist, well-draining soil. Covering the cutting with a clear plastic bag can create a mini greenhouse effect, promoting humidity which is conducive to root development.
Finding Balance: Alocasia Care Adjustments and Observations
Successfully growing Alocasia in low light means continuously observing and adjusting care practices. Since every home environment differs, and Alocasia can be quite sensitive to changes, it’s a good idea to keep a close eye on how your plant responds to your care routine. This vigilance will allow you to make small tweaks, whether that’s moving the plant to a spot with better light, adjusting watering frequency, or altering your fertilization schedule, ensuring your Alocasia remains healthy and vibrant.
Don’t be disheartened if you encounter setbacks; even experienced plant parents have to deal with the occasional yellowing leaf or pest invasion. It’s all part of the learning process. Stay receptive to your plant’s needs, and over time, you’ll gain the expertise to have thriving Alocasia plants—even in the coziest corners of your home.
Bringing It All Together: A Low Light Alocasia Success Story
Encouraging Alocasia to flourish in low light conditions is a testament to the resilience of these beautiful plants and your dedication as a plant caretaker. By creating the right environment regarding light, soil, watering, and humidity, you can foster a slice of the tropics right in your living room—shadowy corners and all. Being mindful of your Alocasia’s requirements, offering it the attention it deserves, and being ready to adapt your care practices will pave the way for healthy growth and vibrant foliage. Remember, each new leaf is a sign of success, a natural reward for your efforts, and a reminder of the serene presence that plants add to any space, no matter the lighting conditions.
Shop more on Amazon